The foundation
A well-functioning foundation is essential for scalable websites, which is why its design and structure should be well thought out.
Turning your back on Webflow Elements
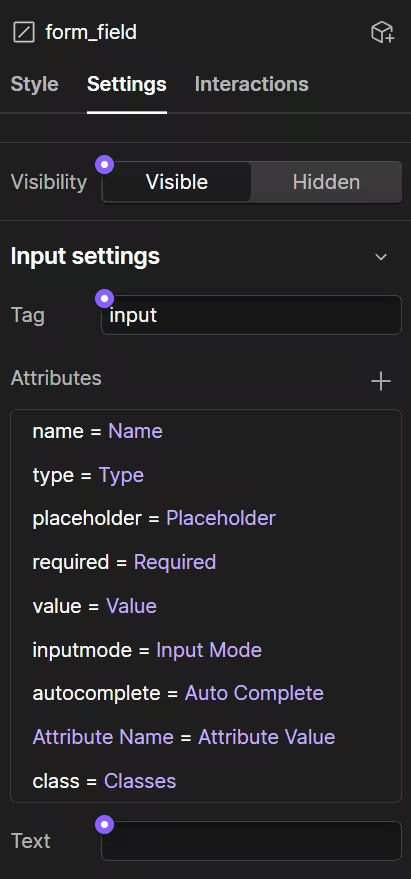
Custom elements have become indispensable for me. I hardly ever use Webflow elements such as forms, inputs, or buttons to create interactions or functionality anymore. Instead, I rely on custom elements such as forms with custom inputs, which give me more freedom. I can create an input component and assign properties such as label, placeholder, input mode, and much more. This enables customers to assemble complex forms from individual components—better than in some CRM tools.
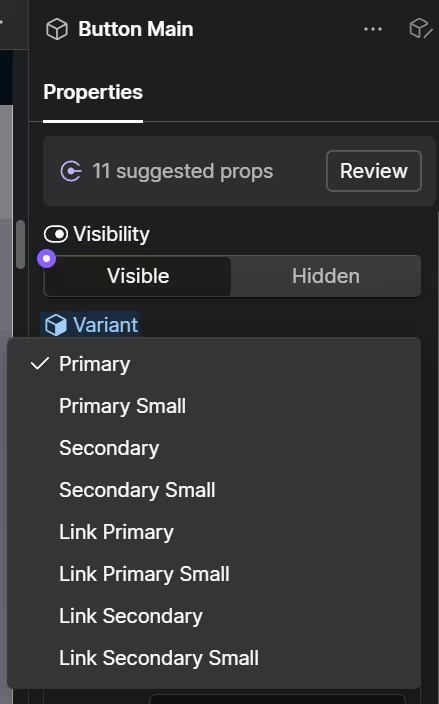
Since buttons do not exist natively, I also use the custom element here, because the Webflow button is actually a link element and therefore has a different functionality than is required for interactive elements such as menus or tabs. In combination with JavaScript, attributes such as "disabled" can then be set, which is important for semantics and accessibility.
Components & Properties
One strategy that Lumos embraces wholeheartedly is open components. The idea here is that instead of creating each section separately, you create global components (e.g., text, headings, buttons with properties) and then place them anywhere you want in build mode. To do this, you use slots in other components and nest the elements. This has the advantage that pages can be created much faster and customers are free to maintain pages as they wish.
In addition, I like to create component variants to create fewer components with more possibilities. For example, I only have one button element, but it can be displayed as a secondary button or link through different variants. It is important to note that the functionality or content should be the same. Otherwise, it makes more sense to create a new component.
Webflow recently released an update to Conditional Visibility, which has expanded the capabilities of Components. Now, visibility can be linked to various properties, such as text elements that should not be displayed if the text is empty, or buttons if no link is stored.
Variables with calc() and themes
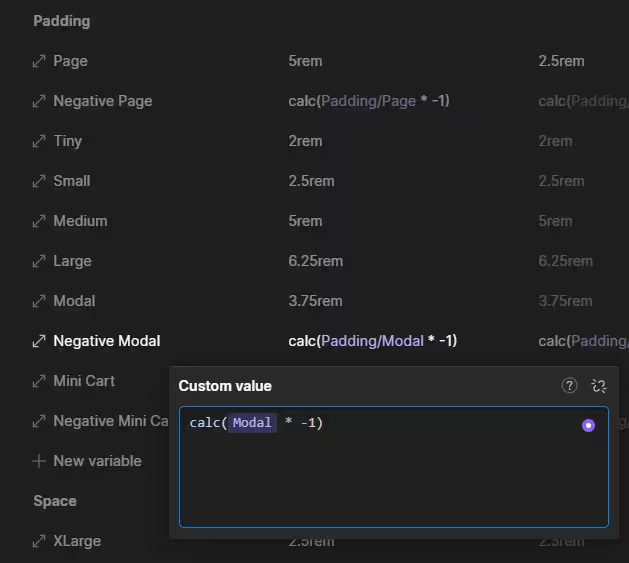
Variables have simplified many aspects of development with Webflow for me—far beyond colors. For example, I often use CSS functions to create complex structures. One example of this is the horizontal spacing in modals and pop-ups. If the design specifies an element within the modal that should have a colored background across the entire width, I can use calc(var(--padding) * -1) to create a negative spacing so that the background is colored across the entire width. Then, within the modal and the colored div, I use var(--padding) again to keep the inner spacing consistent. If the customer changes the spacing in the future, only one variable needs to be adjusted and the others will change automatically based on that.
Of course, I also use variables for colors, which are mainly used in themes in Lumos. This means that a separate variable collection is created to link themes with colors. This allows you to customize the entire theme (e.g., dark mode) in the designer with a single click, while all elements within it remain clearly visible. This is applied to text, backgrounds, focus, and more.
Webflow hacks
First, a little tip that many Webflow users are probably not aware of: if you want to assign CMS lists to a different collection, you usually have to use tools such as F'insweet or manually unlink the content and change the collection. Fortunately, there is a much easier way. All you have to do is click on the lock and then use the arrow keys to change the collection. Webflow will then even try to link the new fields to the content in the list, which usually works quite well.
Now let's move on to the assets, where a lot has happened besides image compression. The automatic setting of alt texts that are accurate and in the right language saves a lot of time and avoids human error. The "Replace Image" feature is also well received by customers, as it allows you to replace the image on the entire page with a single click. Another AI feature is the schema generator, which is certainly not perfect yet, but already creates good schemas that can improve the visibility of the page many times over. Of course, alt texts should always be proofread and generated schemas should be checked with the rich results test or validator from schema.org.
External tools
Webflow can do a lot, but it has its limits—especially when it comes to interaction. That's why I'd like to introduce a few external tools that I like to use in my everyday work:
F'insweet
Most people will already be familiar with F'insweet, but the update to Attributes V2 has brought many improvements. F'insweet allows you to add JavaScript interactivity to pages, for example by filtering, loading, and sorting CMS collections or using small helpful tools such as those for creating a table of contents for articles. I use F'insweet in almost every project and am very grateful that they make the tools available to everyone free of charge. The most common use case for me is filters for CMS collections, which otherwise would require a lot of effort to write yourself in JavaScript.
Swiper JS
Webflow provides a slider in its native elements, but its functionality is very limited. That's why I use an external tool in every project – Swiper JS. With Swiper JS, you can build complex sliders that can vary greatly in their structure. The numerous properties, methods, and events make it possible to communicate with external tools or self-written JavaScript to extend the native functionality. You can group slides, have them slide automatically, dynamically create and style arrows and bullets, set timings and delays, and much more.
Alpine JS
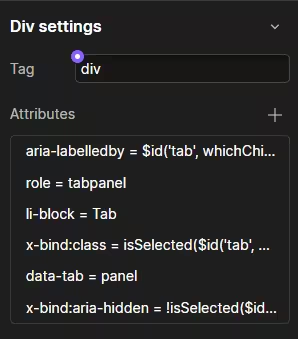
Alpine JS is a JavaScript framework that reactively modifies HTML and is the Swiss Army knife among the tools that extend Webflow. You can do a lot with Alpine JS, but I often use it for tabs, menus, forms, and other interactive elements that you would otherwise create with JavaScript. The advantage of Alpine is that in most cases, you don't have to write a single line of code to create these interactive elements, because you set HTML attributes on the corresponding elements and let them react based on variables.
So setzt man zum Beispiel x-show=”tab === 1” (“x-show” zeigt ein Element an, wenn die Bedingung wahr ist) und auf dem darüberliegenden Element x-data=”{ tab: 1 }”. Wenn jetzt die Variable “tab” auf eine andere Zahl als 1 gesetzt wird, ist das Tab-Element nicht mehr sichtbar. Dieses Prinzip kann man beliebig erweitern - auch mit eigenem JavaScript.
Liquiflow
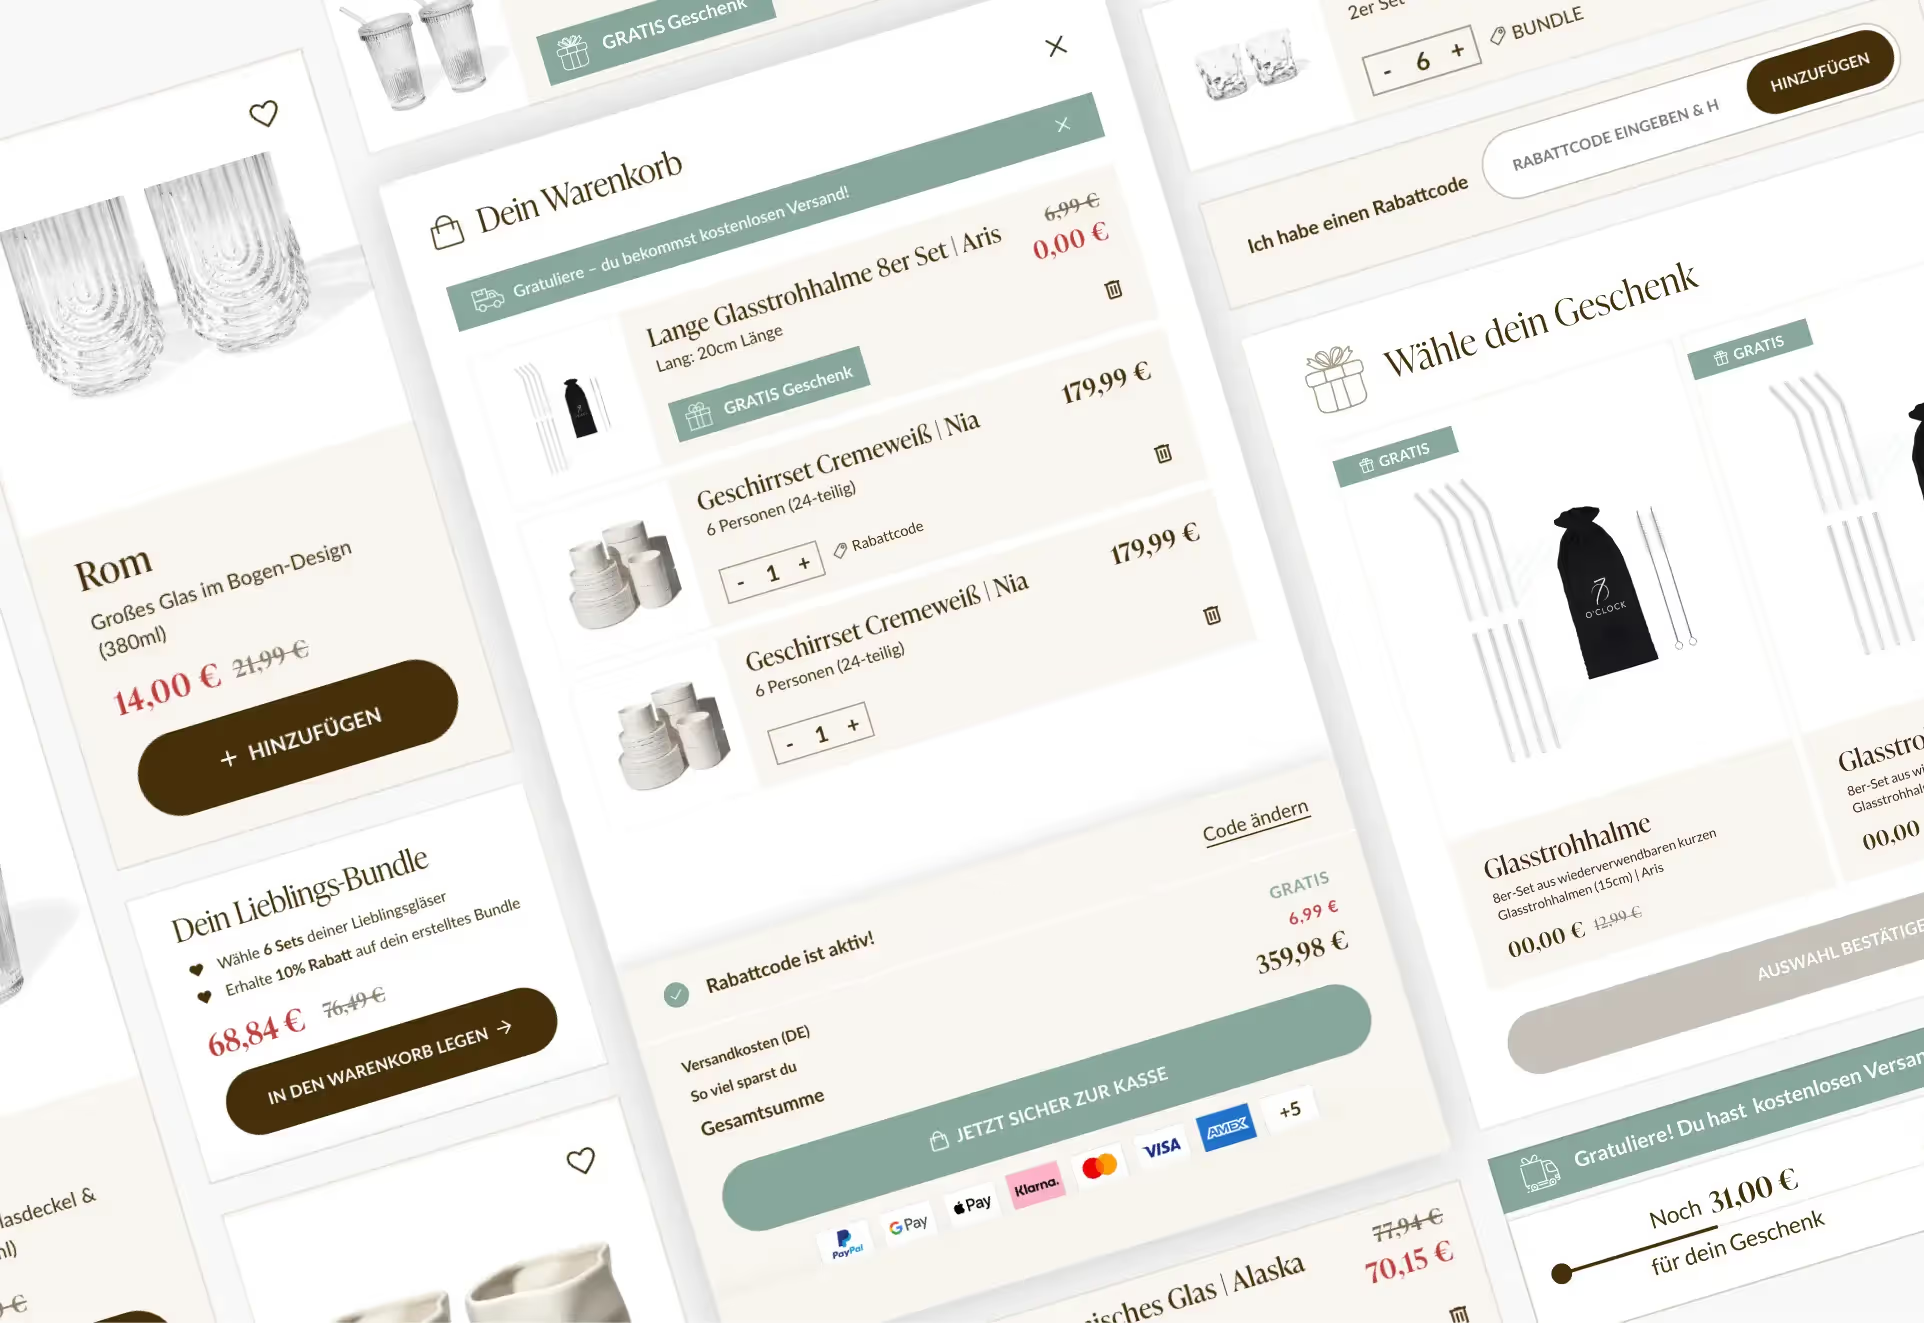
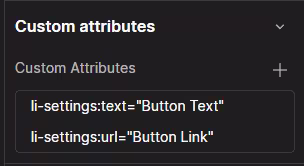
Liquiflow takes a different approach than the external tools mentioned above, as it does not extend the functionality of HTML and CSS, but rather converts the page into the "Liquid" template language. It thus bridges the gap between the design freedom offered by Webflow and the powerful e-commerce backend of Shopify. Liquid is based on Ruby on Rails and is used in every Shopify store for themes. There, you have the option of accessing many different variables that are rendered in the backend and sent to visitors ready to use. To make this possible in Webflow, you set attributes on elements and then convert the entire project into a finished theme. One example is li-settings:text=”Text”, which, after conversion in the Shopify Customizer, creates a field that allows you to change the text content as desired. The same concept applies to images, links, collections, and other elements.
Webflow is just the beginning
The learning curve for tools such as Alpine or Liquiflow may be quite steep, as they extend Webflow's HTML and CSS with JS and Liquid, but they open up numerous new doors for you, as you can now offer your work in an even more professional manner.
Webflow has long since ceased to be a drag-and-drop builder and now offers a solid foundation for enterprise sites that impress with the right tools. So feel free to check out Lumos, Alpine, F'insweet, Swiper, and Liquiflow.